Gameplay
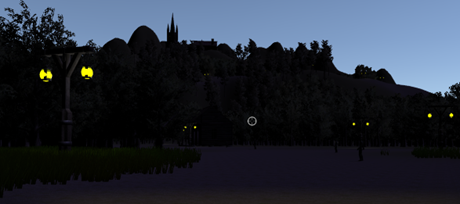
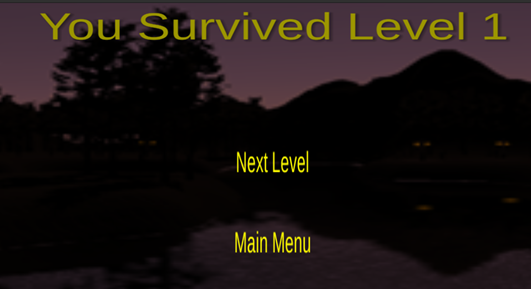
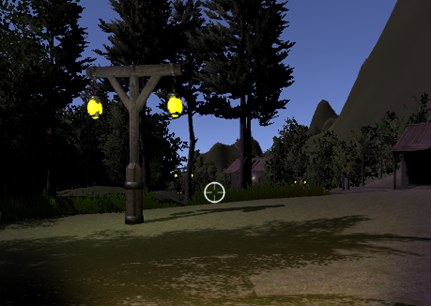
The first level of "Zombie Survival" is set in a forest town, serving as an introduction to the game. Zombies in this level are slower and less intelligent, allowing players to get accustomed to the gameplay and mechanics. Players begin at a barn and must navigate to a glowing sphere that teleports them to the next level. Limited ammo and a flashlight with depleting battery add to the challenge, requiring players to locate batteries to recharge the flashlight and navigate the dark environment effectively.
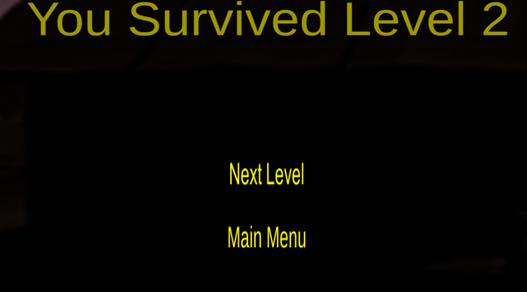
In the second level, the difficulty increases as zombies have a larger detection range and trigger more easily. The map becomes more complex, making the path to the glowing sphere harder to find, though lights help guide players. Ammo and batteries are scattered across the map, requiring exploration to collect resources critical for later levels.
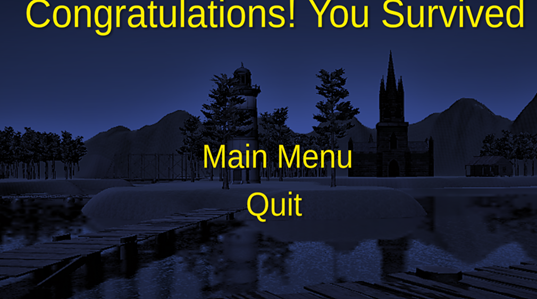
By the third level, the challenge peaks with a new map and smarter zombies that detect players quickly, move faster, and deal more damage. Resource management and strategy become crucial as players face tougher obstacles and stronger enemies.
Rules
• The player has limited ammo and must find ammo scattered all over the maps.
• The player must kill zombies to reach the end point safely.
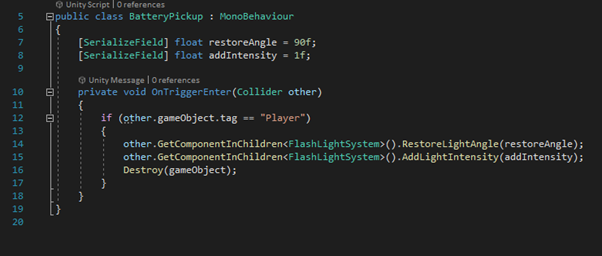
• The player must recharge the flashlight to see clearly at dark.
• The players must share resources with teammate.
• If one of the players dies the game starts from the beginning.
• The player must reach the end point safely to proceed to the next level.
• There are no health refills in the level, so the player needs to be careful.
• When the player reaches at the end of all three levels in this prototype that means he has successfully survived the zombie attack and escaped from the town.
• The player must kill zombies to reach the end point safely.
• The player must recharge the flashlight to see clearly at dark.
• The players must share resources with teammate.
• If one of the players dies the game starts from the beginning.
• The player must reach the end point safely to proceed to the next level.
• There are no health refills in the level, so the player needs to be careful.
• When the player reaches at the end of all three levels in this prototype that means he has successfully survived the zombie attack and escaped from the town.
Pillars of the game
• Zombies get triggered when the player is inside the range or when the player shoots at the zombie.
• Zombies will attack when player is close to it.
• Flashlight Mechanic with recharging.
• Ammo counts for each weapon.
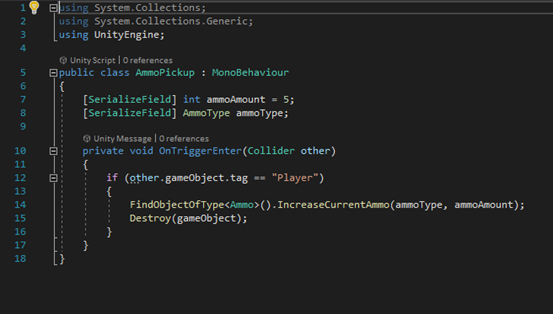
• Ammo pickup for each weapon.
• Player can cycle through weapons.
Player Experience: Intense, Teamwork, Survival
Core Mechanic: Shoot Zombies, Collect ammo, Recharge flashlight
Core Game-Loop: Collect ammo, shoot enemies, recharge flashlight and reach the end of level.
• Zombies will attack when player is close to it.
• Flashlight Mechanic with recharging.
• Ammo counts for each weapon.
• Ammo pickup for each weapon.
• Player can cycle through weapons.
Player Experience: Intense, Teamwork, Survival
Core Mechanic: Shoot Zombies, Collect ammo, Recharge flashlight
Core Game-Loop: Collect ammo, shoot enemies, recharge flashlight and reach the end of level.
Features of the Game
• First-Person camera movement
• Ray-casting to shoot
• Enemy move and attack AI
• Player health and damage system
• Enemy health and damage system
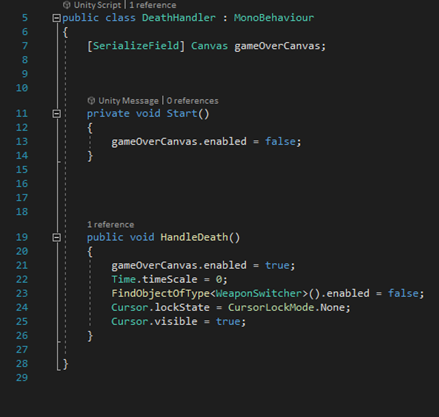
• Death/ Game over
• Weapon Switching
• Ammo and ammo pickups
• Flashlight and battery pickup
• Pro-builder geometry
• Dark Theme and Fog effects
• Different particle effects
• Terrain, trees, bushes, and water
• Lighting
• Single Player mode
• Ray-casting to shoot
• Enemy move and attack AI
• Player health and damage system
• Enemy health and damage system
• Death/ Game over
• Weapon Switching
• Ammo and ammo pickups
• Flashlight and battery pickup
• Pro-builder geometry
• Dark Theme and Fog effects
• Different particle effects
• Terrain, trees, bushes, and water
• Lighting
• Single Player mode
Obstacles
Zombies are the main obstacles in the game as they will try to kill the player before he tries to escape. The other obstacle is the night because it becomes hard for the players to move around the map and see at night. Limited ammo is a also an obstacle if the ammo is finished then the player will not be able to kill the zombie and die eventually. Flashlight will play an important role in the game as it will help the player too se inside the houses and search for ammo around the ammo but flashlight also runs out of batter so the player has to find battery all over the map.
Level Design
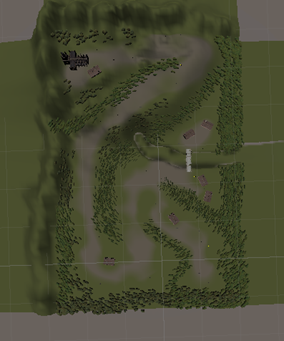
The first level serves as an introduction to the game, offering a basic challenge for players to familiarize themselves with the mechanics. Zombies are scattered across the map with reduced detection range and damage, making it easier for players to progress.
The level features a straightforward path to the endpoint but is filled with zombies and shrouded in darkness. Ammo and batteries are placed inside houses for players to collect, ensuring they can replenish resources. The objective is to navigate through the map and locate the church to complete the level and advance to the next stage.
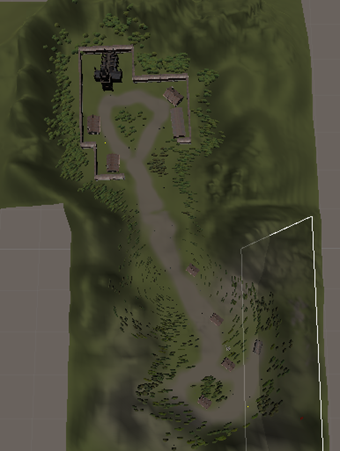
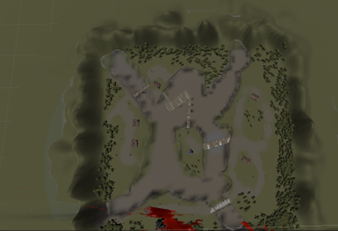
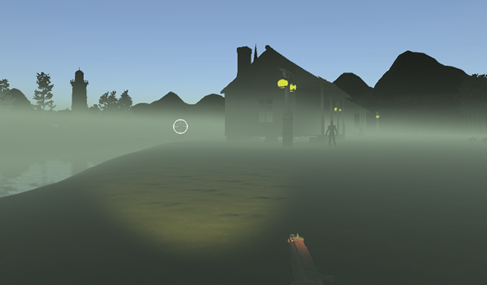
The second level is a bit more challenging as there are 2 pathways one leads to a blocked path as a time waster so the player will have to explore more of the second level so that he can reach till the end. The second level also has a bridge so that the player can cross the stream of river without falling in the water. The second Level is much more challenging as the player must walk towards the top of the mountain in this level as the church is located on the top of the mountain.
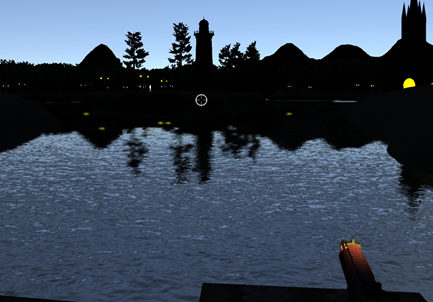
The third level is the most challenging in the game, featuring a landscape dominated by water with limited land areas. If the player falls into the water, it results in immediate death. This level is more intricate and confusing compared to the previous two, with darkness adding to the difficulty as the player must locate the church to complete the game.
The zombies in this level are significantly smarter and can detect the player's presence from a much greater distance. They are also faster and more aggressive, making survival and navigation even tougher.
Assets Design and Implementation
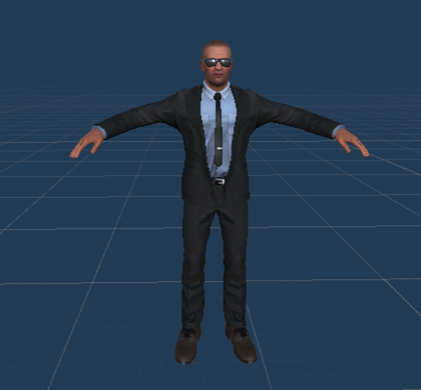
Figure below illustrates the player character used in this game, sourced from the Unity Asset Store under the name "Bodyguards." Due to time constraints, we opted for this pre-built character model, which included animations and textures, eliminating the need for time-intensive modeling, texturing, and rigging. This ready-made character allowed us to focus more on game development rather than asset creation.
The Unity engine's capabilities enabled us to attach various components to this character, such as movement scripts, weapons, and a flashlight. The movement script includes adjustable features, such as movement speed and a sprint function, which can be modified directly within the Unity Inspector panel. Additionally, the flashlight and weapon were integrated as prefabs, streamlining the process of attaching these elements to the character. Unity's prefab system ensures that any changes made to the character's components are automatically updated wherever the character is used in the game, significantly improving efficiency.
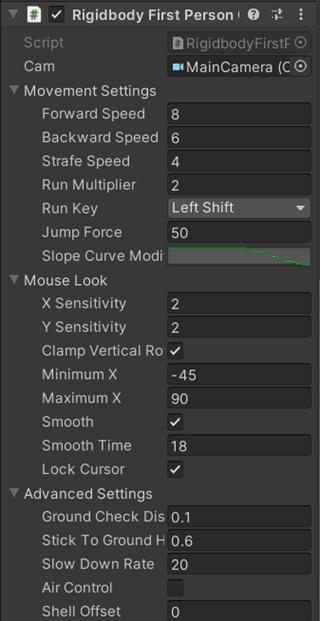
Figure below shows the integration of the "Rigid Body FPS Controller" script with the player character. This script governs movement mechanics and offers customizable parameters directly in the Inspector panel, allowing us to tweak features without revisiting the code. Similarly, the "Player Health" script was added to manage hit points and damage mechanics, determining the player's survival during gameplay. These built-in Unity features simplify development, enhancing workflow and productivity.
Enemy Character Design and Implementation
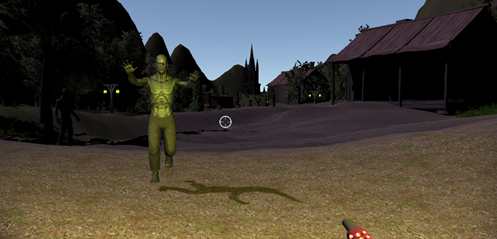
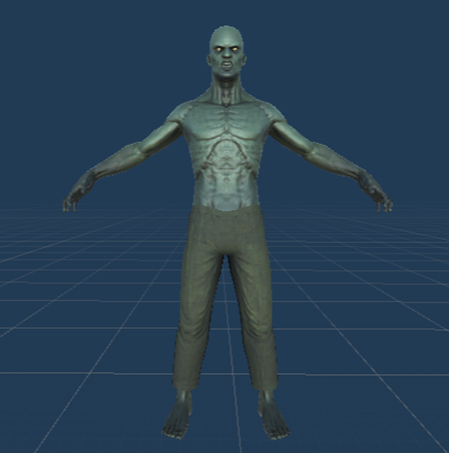
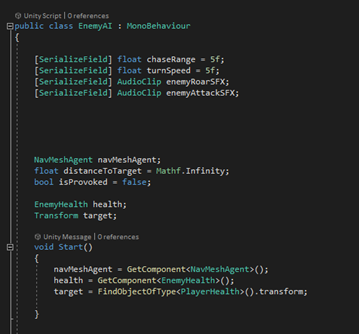
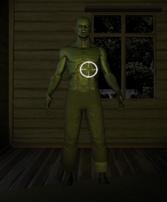
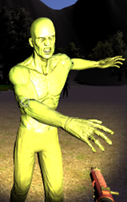
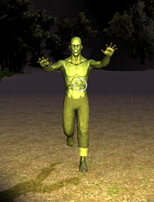
Figure below showcases the zombie character used throughout the game. This model, downloaded from the Unity Asset Store under the name "Zombie," was chosen due to time constraints, as creating a custom zombie character through modeling, texturing, and rigging was not feasible. The asset includes pre-built animations and textures, which allowed us to allocate more time to other aspects of the game's development.
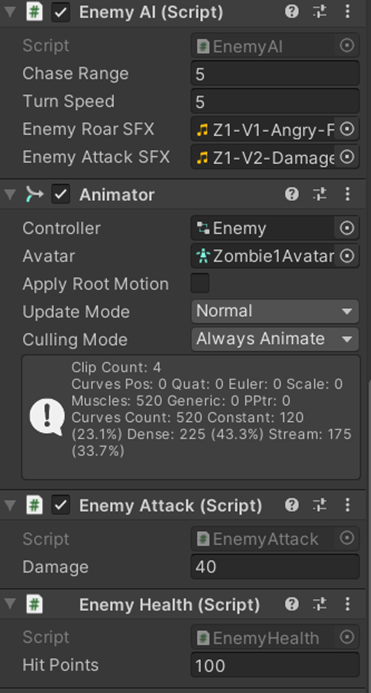
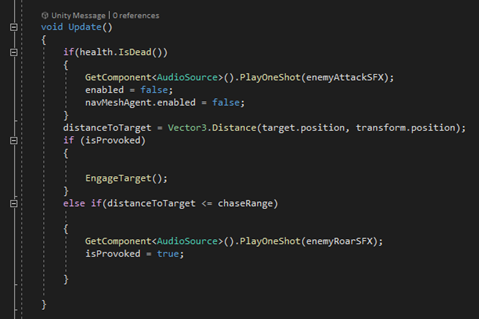
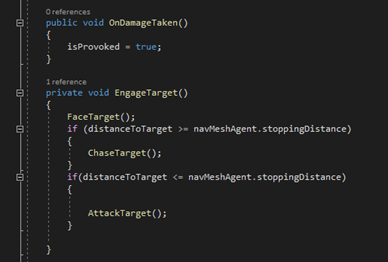
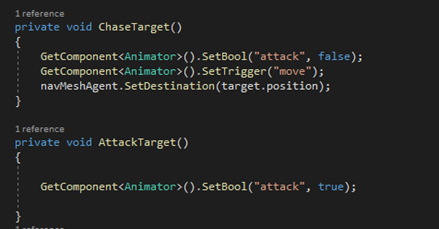
Unity's flexibility enabled us to attach various scripts to the zombie character, including EnemyAI, EnemyHealth, and EnemyAttack. These scripts control the enemy's behavior, health management, and attack mechanics, ensuring they function as intended within the game.
Figure below demonstrates the benefits of Unity's serialized fields and hierarchical structure. These features allow developers to adjust parameters such as range, speed, attack power, health, and damage directly from the Unity Inspector panel, eliminating the need to edit the script repeatedly. This feature streamlines the development process and makes balancing gameplay mechanics much more efficient.
Additionally, Unity's NavMesh Agent was integrated into the zombie character to facilitate pathfinding. This component enables the AI to navigate the terrain intelligently, ensuring it can identify and follow the player while avoiding obstacles. This feature is critical for creating dynamic and challenging enemy behavior.
Weapon Design and Integration
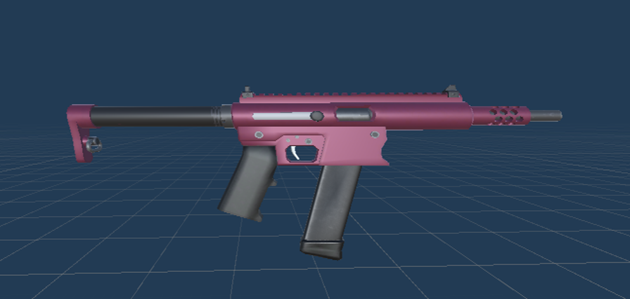
Figure below showcases the weapon used in the game, identified as "Carbine," which was sourced for free from the Unity Asset Store. Due to time constraints, creating a custom weapon model and its textures was not feasible. This pre-made asset provided a practical solution, as it came with pre-configured animations and textures, saving us significant time in the modeling and texturing process.
Unity's flexibility allows for the attachment of scripts to this weapon, enabling it to function seamlessly within the game. Additionally, micro prefabs, such as a flashlight, were integrated into the weapon to enhance gameplay. These prefabs work in conjunction with the weapon, adding functionality and improving the player's experience without requiring extensive custom development.
This approach highlights Unity's ability to streamline the game development process, allowing developers to focus on core mechanics and game design while leveraging high-quality assets from its store.
The weapon script was attached to this model and unity allowed us to change the range, damage and add particle effects and sound effects. After adding all the components unity allows us to make it into a prefab so that later when we make changes to the components it will change everywhere else this character is used too. All this is possible because of the features of the Unity engine.
Unity allowed us to create child prefab from which we can cycle through different type of weapons, and we created 3 types of weapons called the Carbine, Shotgun and Pistol. Each gun has a different range and different damage and shot fire rate. All this just by using one weapon script and adding to other children prefabs so that we do not have to change and make separate scripts for each weapon. The carbine can also zoom so we added the weapon zoom script just to the carbine. And because others are child prefabs, they would not be affected by the weapon zoom script.
Unity allowed us to create child prefab from which we can cycle through different type of weapons, and we created 3 types of weapons called the Carbine, Shotgun and Pistol. Each gun has a different range and different damage and shot fire rate. All this just by using one weapon script and adding to other children prefabs so that we do not have to change and make separate scripts for each weapon. The carbine can also zoom so we added the weapon zoom script just to the carbine. And because others are child prefabs, they would not be affected by the weapon zoom script.
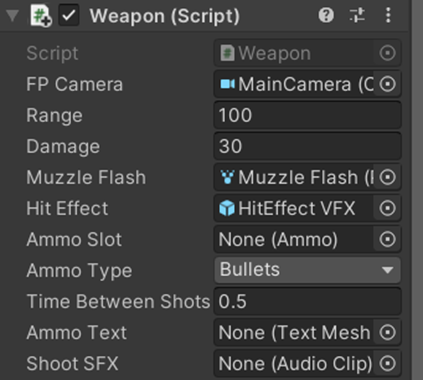

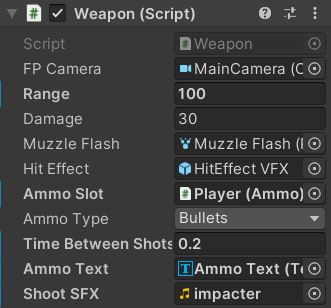
The figure 1 shows the weapon script component which is attached to the carbine prefab as you can see in the figure that the range for this gun is 100 and damage is 30 it also uses a different ammo type which is “Bullets” and there is a less time between shots which is 0.2 and we ca also add a different sound effect for this gun.
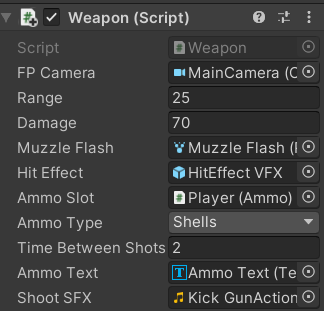
The figure 2 shows the weapon script component which is attached to the shotgun prefab as you can see in the figure that the range for this gun is 25 and damage is 70 it also uses a different ammo type which is “Shells” and there is a less time between shots which is 2 and we can also add a different sound effect for this gun.
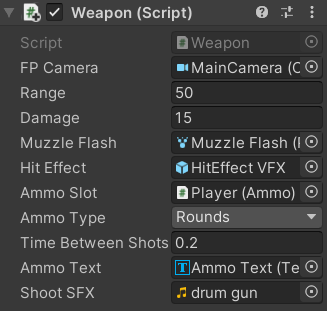
The figure 3 shows the weapon script component which is attached to the pistol prefab as you can see in the figure that the range for this gun is 50 and damage is 15 it also uses a different ammo type which is “rounds” and there is a less time between shots which is 0.2 and we can also add a different sound effect for this gun.
Photon Unity Networking 2 (PUN2)
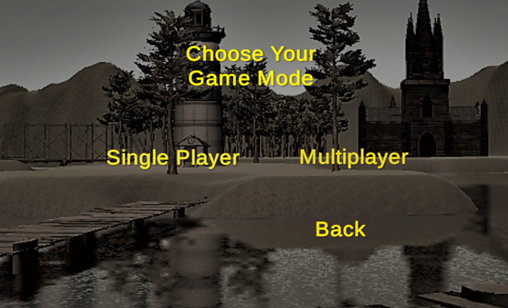
In this game, we implemented a basic multiplayer feature using PUN2 (Photon Unity Networking 2) from the Unity Asset Store. After recent updates, PUN2 has become a built-in feature of the Unity game engine. Our game prototype provides two options for players: Single Player Mode and Multiplayer Mode. While the level design remains consistent across both modes, there is a slight difference in the number and behavior of enemies that spawn when playing in multiplayer mode.
Multiplayer Implementation:
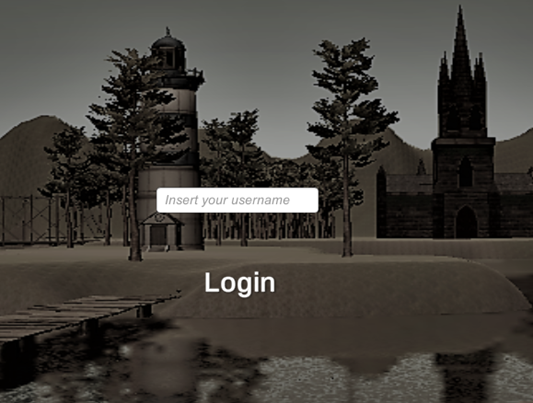
Username Input:
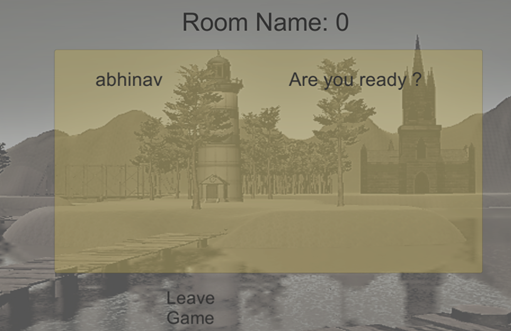
Players must enter a username, which will be displayed in both the lobby and the game scenes.
Players must enter a username, which will be displayed in both the lobby and the game scenes.
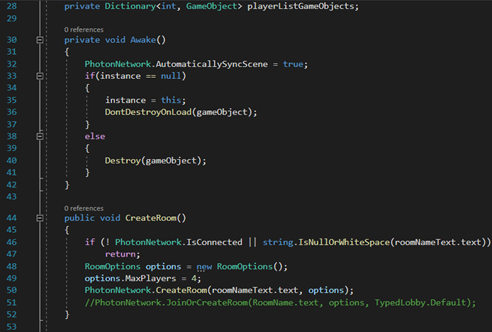
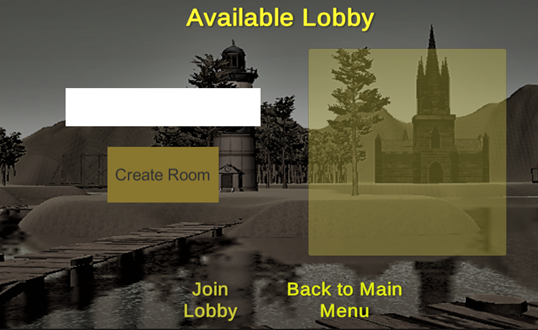
Creating or Joining a Room:
After entering their username, players are directed to the "Create Room" or "Lobby Panel." To create a room, the player needs to input a room name.
After entering their username, players are directed to the "Create Room" or "Lobby Panel." To create a room, the player needs to input a room name.
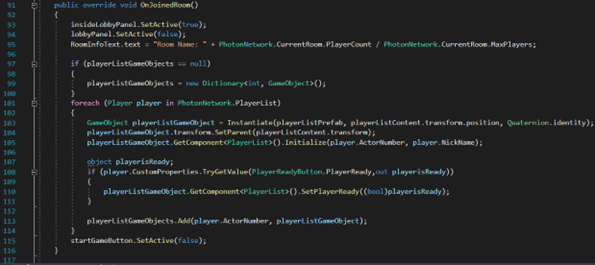
Lobby/Room Panel:
In the lobby panel, all players can see the list of participants who have joined the room.
In the lobby panel, all players can see the list of participants who have joined the room.
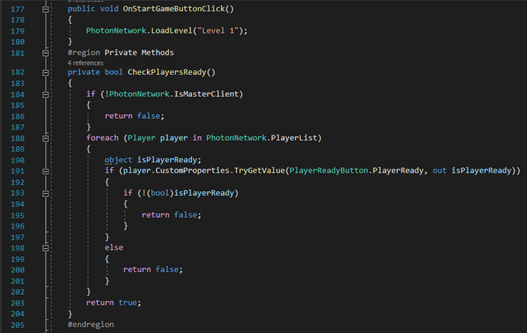
Game Start Process:
Players must mark themselves as Ready before the game can start.
Only the Master Client (the player who created the room) has the authority to start the game once all players are ready.
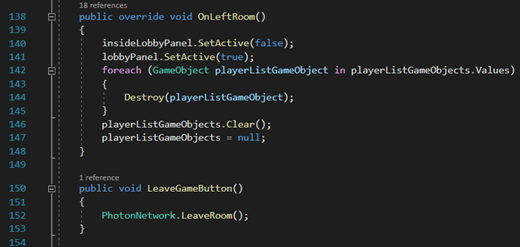
Leaving the Lobby:
If a player decides to leave the lobby, they can do so by pressing the "Leave Lobby" button, which redirects them back to the "Create Room" panel.
If a player decides to leave the lobby, they can do so by pressing the "Leave Lobby" button, which redirects them back to the "Create Room" panel.
This multiplayer feature enhances the game’s interactivity and allows for a cooperative or competitive gameplay experience, depending on how players engage with the enemies and levels.
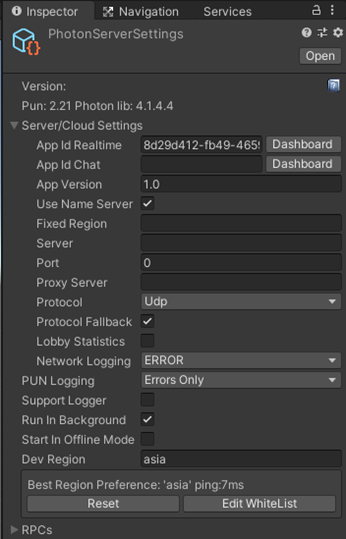
Figure above illustrates the Photon Network Settings. To set up a multiplayer game, the first step is to insert the App ID Realtime, which is essential for connecting to the Photon server. Next, the App Version must be specified to ensure compatibility with the game. Additionally, to enable players to connect and meet others in the same region, it is important to select the appropriate Dev Region. In this case, the region is set to Asia, ensuring that players within that region can find and interact with each other.
Coding

Animations
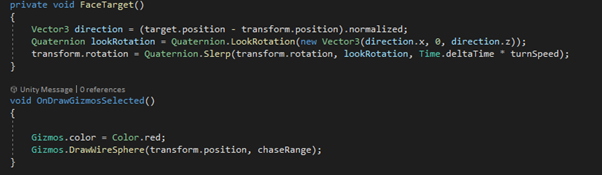
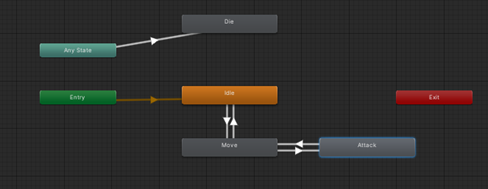
An Animator Controller is a tool that helps organize and manage a set of Animation Clips and related transitions for a character or entity. In games, it's common to have multiple animations that need to switch depending on the situation. For example, pressing the space bar might transition the character from a walk animation to a jump animation. Even if there's only one animation, it still needs to be placed in an Animator Controller to be used on a GameObject. The Animator Controller uses a State Machine to handle the various Animation Clips and their transitions, which can be thought of as a flowchart of animation states and transitions. In our game, the Animator Controller is used for both the zombie and player characters, managing their states for idle, running, and attacking animations.
User Interface


Shadows and Reflections
Shadows play a crucial role in adding depth and realism to a scene, as they help highlight objects that would otherwise appear flat in terms of scale and position. In Unity, lights can cast shadows from a GameObject onto itself or neighboring GameObjects. Imagine a simple scene with a single light source. The light rays travel in straight lines, and when they reach a GameObject, they can no longer continue to illuminate other objects; they are blocked by the first GameObject, casting shadows in the areas where the light cannot penetrate. These shadows are the regions that remain unilluminated because the light is obstructed.
Unity’s ability to generate reflections and shadows, as seen in the figure, was instrumental in enhancing our game's development. This method allows the creation of dynamically lit environments with rich global illumination, where light bounces off surfaces and responds to real-time lighting changes. A time-of-day system, where the light's location and color shift over time, exemplifies this, and it is something not achievable with traditional baked lighting.
Limitations
There were several limitations encountered during the development of our game prototype. The first challenge was our limited experience with the PUN (Photon Unity Networking) system, which caused significant delays in the project. It took us around a month just to get the lobby functionality working. This setback impacted the development of the gameplay, which was not as polished as we had hoped due to time constraints and limited manpower within our group.
Another issue we faced was communication within the team. Effective communication was a challenge, leading to occasional misunderstandings and confusion, especially when working on assignments and sharing crucial information. This hindered our workflow and slowed down the development process.
Lastly, our lack of knowledge about AI in game engines posed a significant challenge. Since AI is a core feature in our game, our insufficient understanding of how to properly implement AI in the prototype limited the quality and functionality of this aspect of the game.